When you have a condition that makes you motion and stimulation sensitive, it can be really tough to navigate modern-day User Experience (UX) conventions. It is fairly typical in modern practices to have websites or apps with lots of javascript and fancy transitions between pages or loading different aspects of the page. It’s also common to obfuscate text labels of different menus in favor of icons, which can be remarkably hard on a brain that has trouble processing information.
For example, when reading the word “Home” on a menu bar, it’s easy to connect mentally that clicking “Home” will take you to the home page — even if your brain is being a bit slow that day. A symbol of a home, however, takes some more brain processing power to understand, this image is a home, so they mean “home page.” This can get rather difficult for less obvious menu options (looking at you Atlassian) and using more abstract symbols to fit a certain aesthetic. In future posts, I will show some examples and where to navigate in order to switch to text based layouts!
Sometimes, for applications and computers, there will be an option to modify your experience, especially in the case of animation and resolution of your screen. This usually happens under the options in “Accessibility Settings” and “General Settings.” To start this series, I will be using iOS. But it is very likely the steps or flow to get to these menus on other operating systems will be the same, in case you did not want to wait for my future posts!
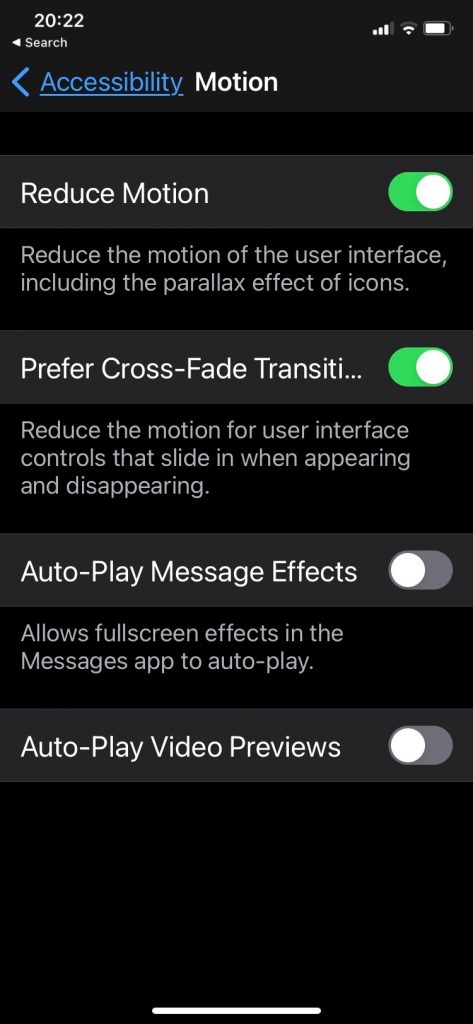
Animation in iOS
To disable animation in iOS, go to Settings > Accessibility Settings > Motion. There you can toggle on “Reduce Motion” and “Prefer Cross-fade Transition.”
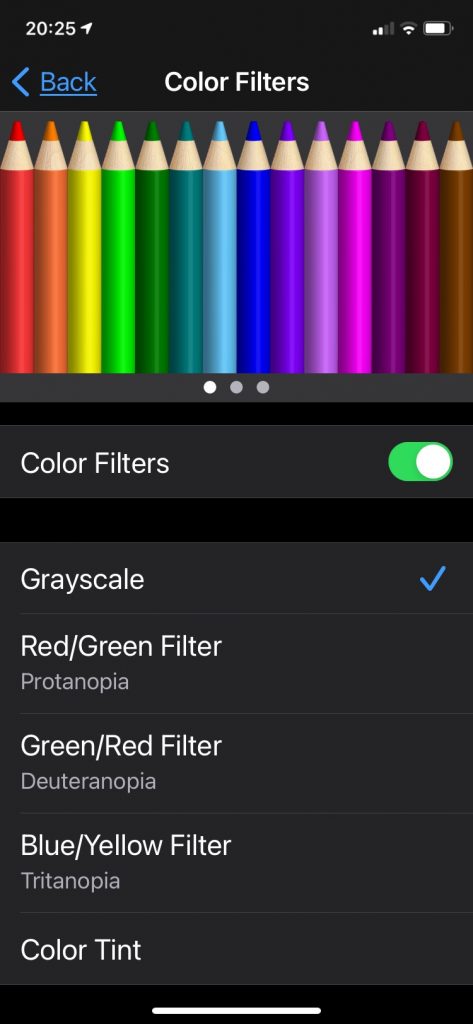
Grayscale in iOS
To enable grayscale in iOS goto Settings > Accessibility Settings > Display & Text Size > Color Filters. Toggle this on and select grayscale.
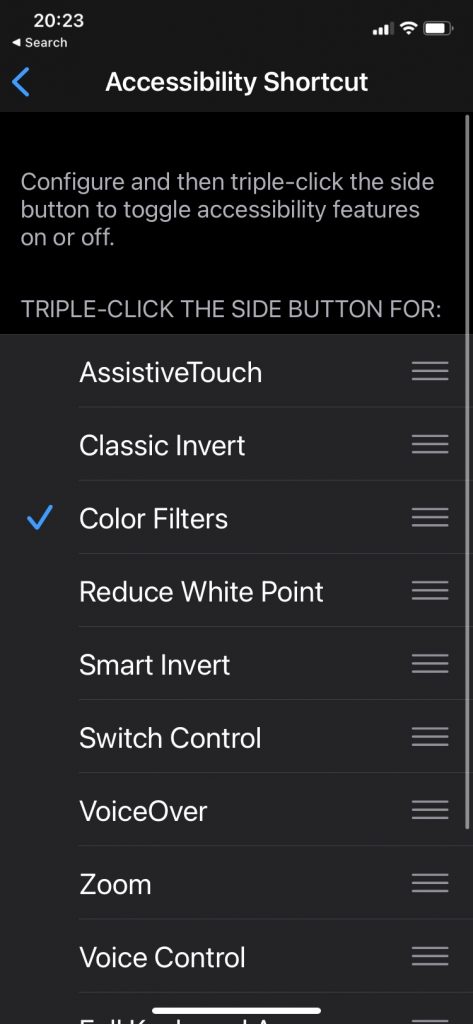
You can set a shortcut here to turn grayscale on and off in the future. On the main “Accessibility Settings” menu on the bottom, select “Accessibility Shortcut” and select “Color Filters.” Now you can toggle grayscale on/off by clicking the power button three times!
Resolution in iOS
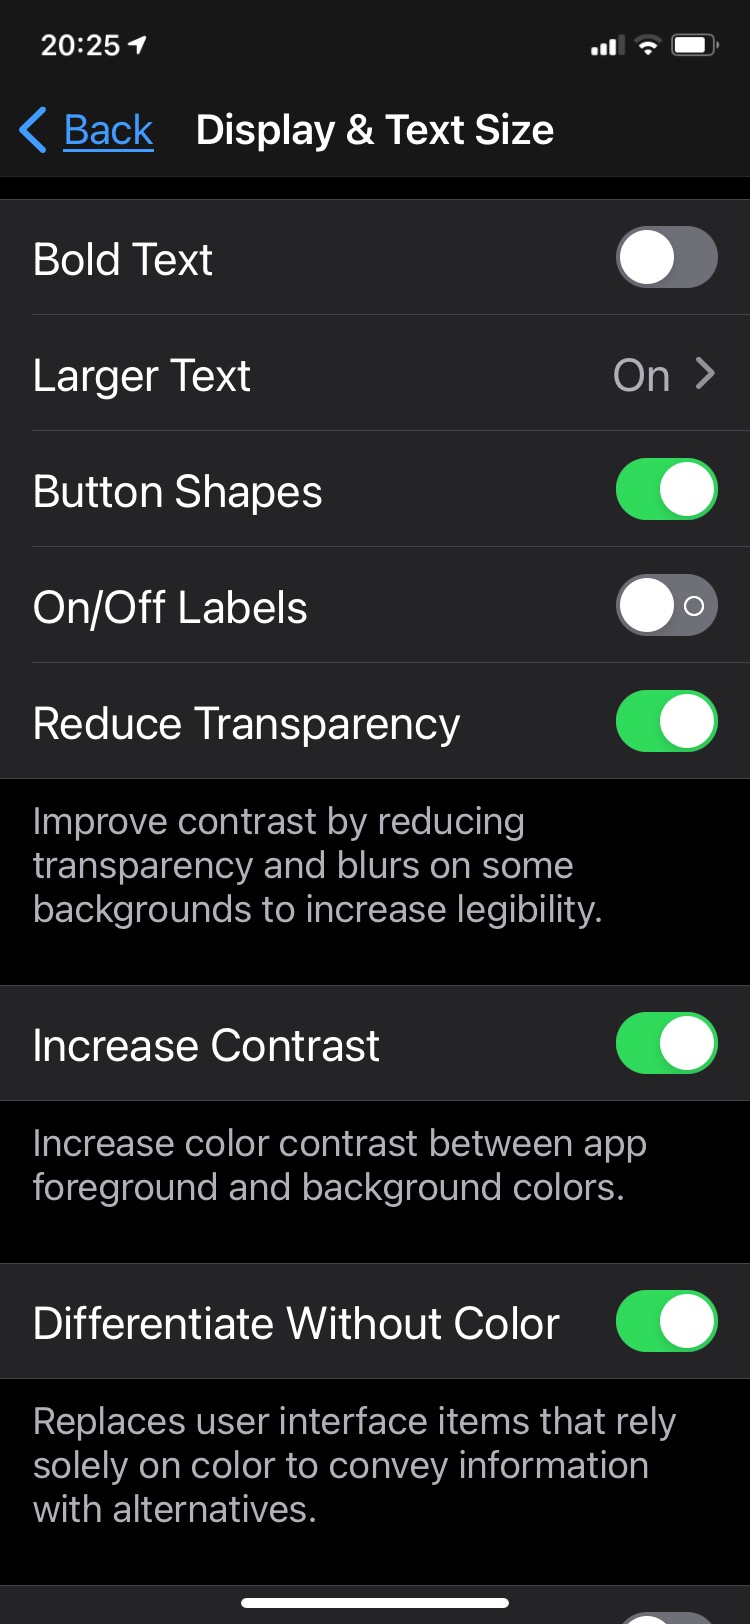
To modify your resolution in iOS goto Settings > Accessibility Settings > Display & Text Size. It will be under “Larger Text.” I also like to turn on “Reduce Transparency” and “Differentiate without Color” here too.
Just to note: changing the size of your text does not mean that the application will honor it. If it does, it likely will be jumbled and render the app unusable because the maintainer did not consider this use case when developing the app, unfortunately.
As a general guide, hunting in websites, computers, phones, settings will yield a hidden trove of different customizability options that can help make your day-to-day a bit easier. I hope this post inspires you to take a peek under the hood of the devices that are ingrained in our daily experience. I hope these tweaks make the struggle through your symptoms just a tad more bearable. Let me know if it did in the comments! Stay strong my friend.